When using SolidWorks Network / Floating licenses, you must first upgrade your SolidWorks Network License Server to the current version, before upgrading the client machines. You will then be able to run the previous version of SolidWorks as well as the latest version. During the upgrade, client machines should not be running SolidWorks.
Part 1 – Removing the Currently Installed SolidWorks SolidNetWork License Manager.
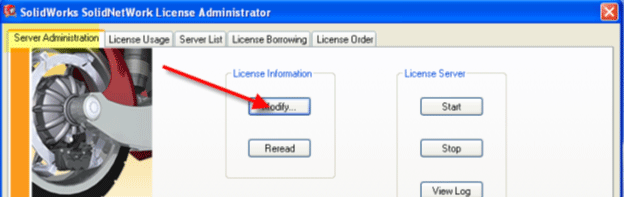
1. First of all, you need to transfer your SolidWorks license back to the SolidWorks Activation server. To do this start the “SolidNetWork License Manager” from Start > Programs > SolidWorks version > SolidNetWork License Manager > SolidNetWork License Manager , then click the “Modify” button as below.
2. On the next screen, select “Transfer a Software License” and click next.

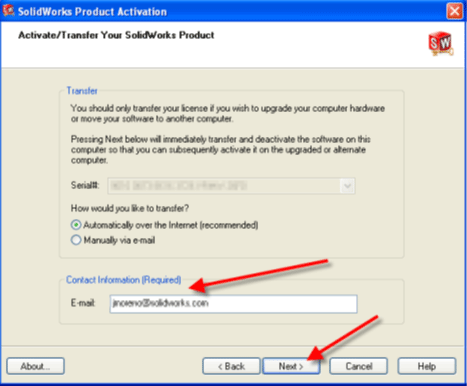
3. You now need to confirm that you with transfer your license over the internet and confirm your email address. Then click next.
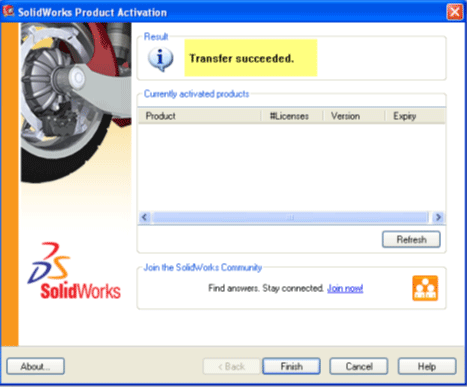
4. When the following screen appears, you have successfully transferred your license back to SolidWorks, ready to re-install.
5. From “Control Panel” use “Programs and Features” to locate and uninstall the “SolidWorks SolidNetWork License Manager”.
Part 2 – Installing the Latest Version of SolidWorks SolidNetWork License Manager.
6. Start the SolidWorks Installation manager, from your SolidWorks media or download location.
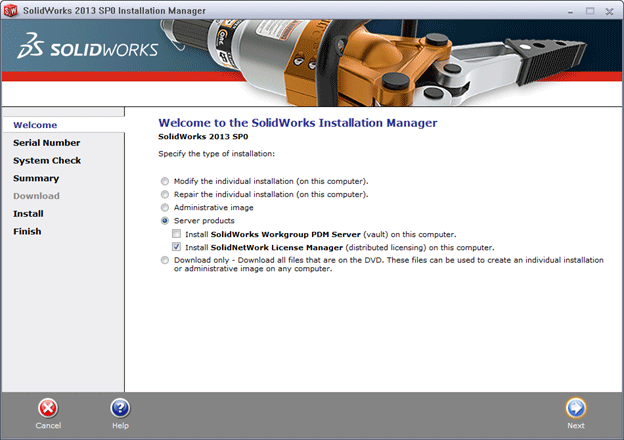
7. On the Welcome screen choose the “Server Products” option then “Install SolidNetWork License Manager” as shown below and click next.
8. Enter your SolidWorks Network License Serial Number, choose an installation location and click next.
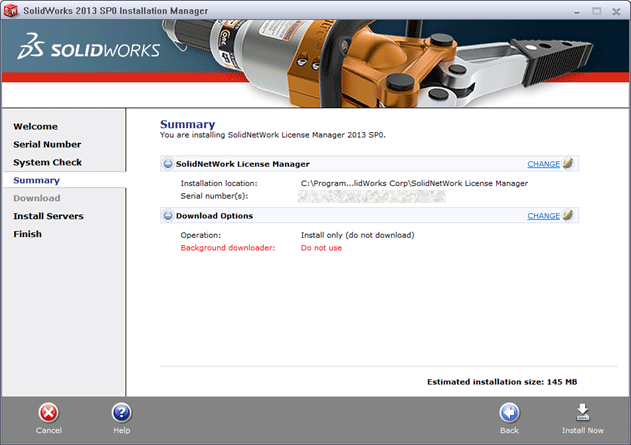
9. On the following summary screen, confirm the details and click “Install Now”.
10. Allow the install to run through, until complete.
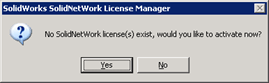
11. You now need to Activate SolidNetWork Licensing.
Start the “SolidNetWork License Manager” from Start > Programs > SolidWorks version > SolidNetWork License Manager > SolidNetWork License Manager .
When prompted to activate, click “yes”.
12. On the SolidNetWork License Server Information screen:
a. If your company uses a firewall, select “A firewall is in use on this server”.
b. Use the default value for Port Number (and for Vendor Daemon Port Number if you have a firewall) or specify the port numbers your company uses. The port number is a TCP/IP port number in the 1024-60000 range, used exclusively by this process. Normally, the default (25734) is suitable and is unlikely to be the same as any other FLEXnet server process currently on the license manager computer.
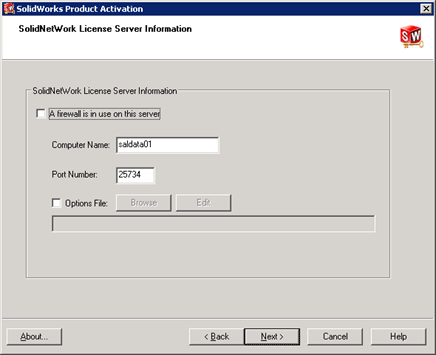
![]() Make a note of the server name and port number used here, you will need this information when installing SolidWorks on the client machines.
Make a note of the server name and port number used here, you will need this information when installing SolidWorks on the client machines.
13. There are three things to configure to avoid firewall issues when using the SolidNetWork License Manager:
a. Add TCP/IP ports 25734 and 25735 to the firewall exception list.
b. Check “A firewall is in use on this server” and leave the ports number by default in the SolidNetWork License Manager options.
c. Add the following programs to the firewall exception list (lmgrd.exe and sw_d.exe that are stored in the SNL installation folder).
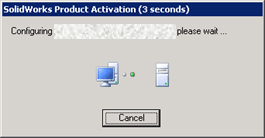
14. On the following screen, enter your email address and choose the option to “Activate over the internet”.

15. The following dialog appears while the installation communicates with the SolidWorks Activation Server.
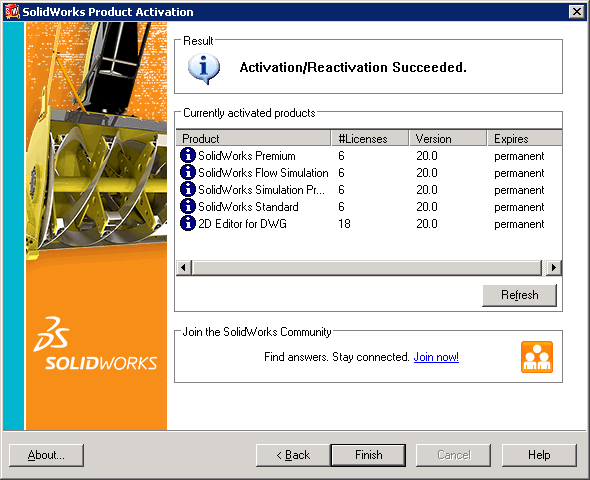
16. The following screen confirms successful activation.
17. Click finish and proceed to install client software.
18. When the SolidNetWork License Manager window appears, just click OK to close and proceed with installing the client machines.
