The master modeling technique is nothing new. In fact it’s been a common practice in 3D CAD since before SOLIDWORKS even came on the scene in 1995. If you aren’t familiar with it, the basic idea is that your end product, let’s say some industrial designed enclosure, is one continuous shape, but it’s actually manufactured as many different bodies, sometimes made of different materials that are then assembled together. Rather than making a bunch of individual parts, you create one “Master Model” that represents the overall shape and that drives the shapes of all the downstream components that contain all of the little details, like lips and grooves, fastening features, or cut outs and vents. Now when a change is made to the overall shape, it can be made in one place and all of the downstream components update. You may have come across an example if you’ve ever taken the SOLIDWORKS Advanced Surface Modeling training course where a master model for a computer speaker is created by using the “Insert Part” feature into the beginning of each of the components feature trees.
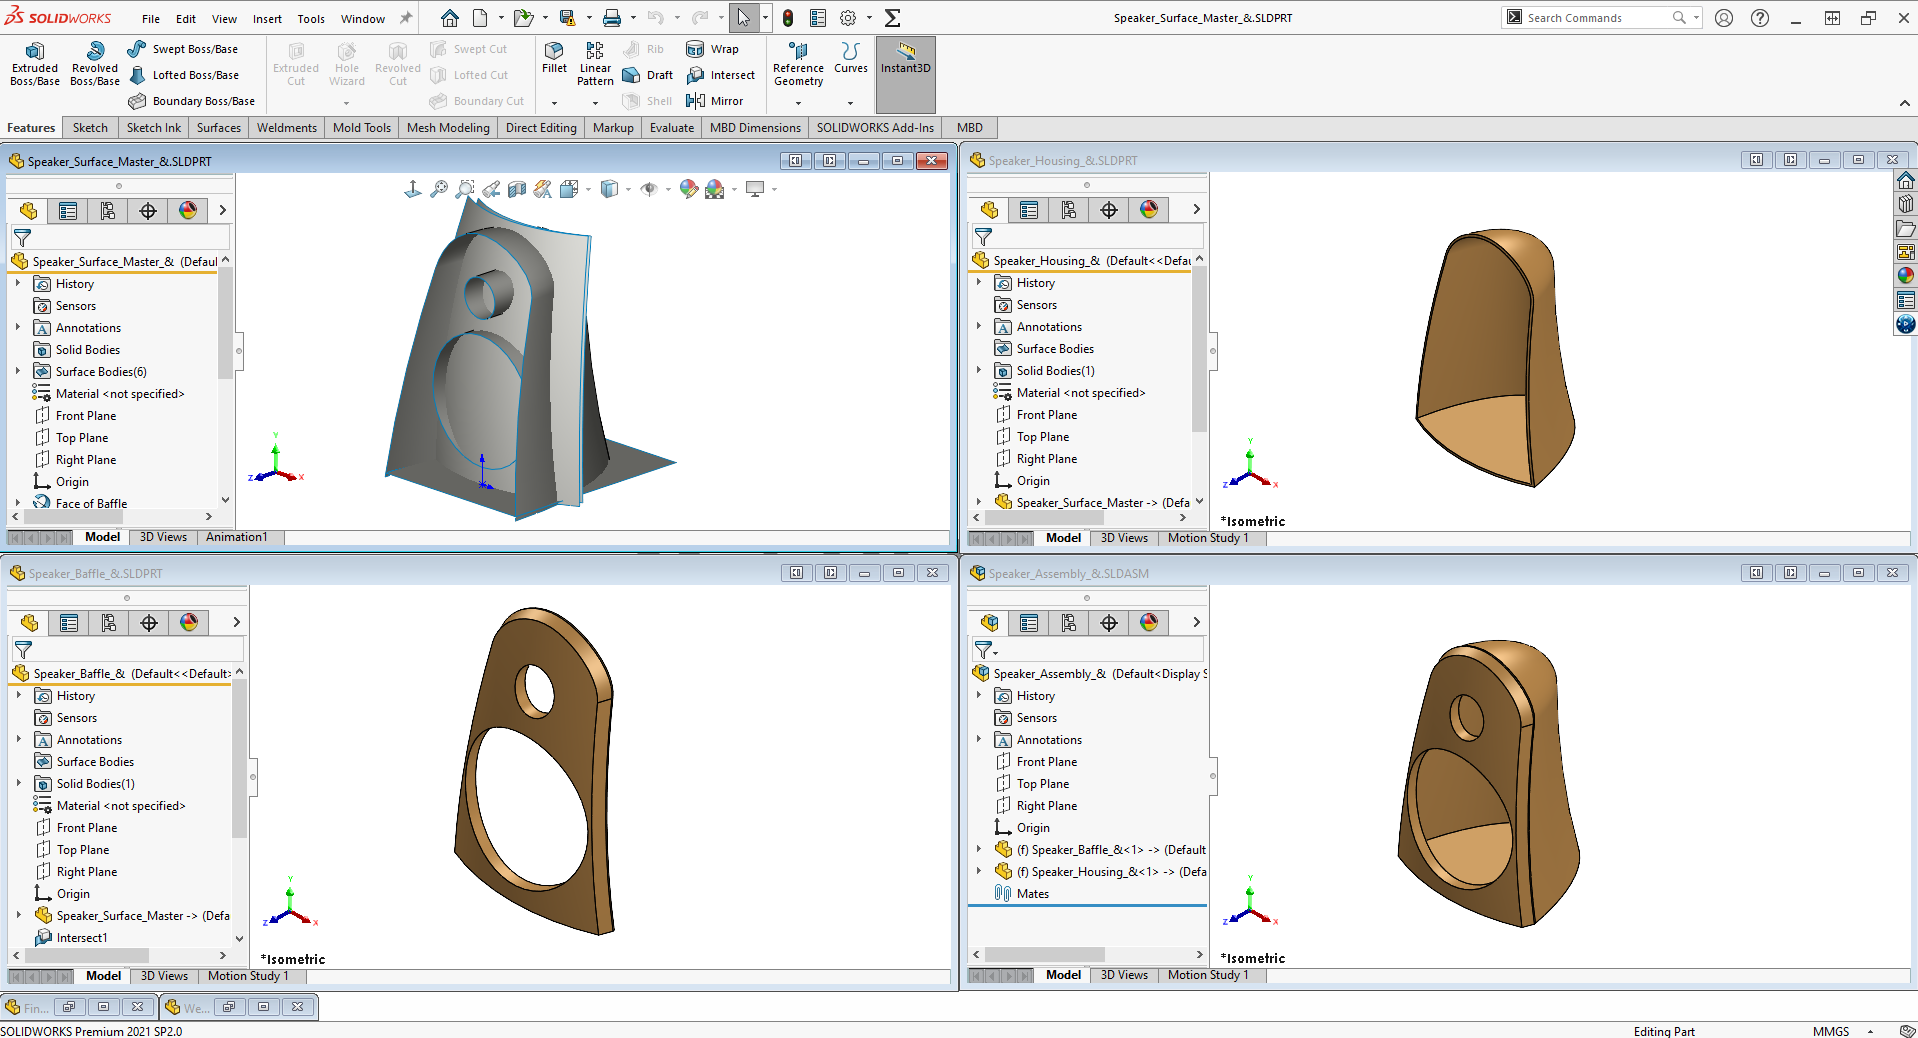
In this example when a change is made to the master model…

Everything downstream will update according the newly updated “Insert Part” feature…

Obviously this is a very simplistic example. There are only two components and a handful of features in each one. But you could imagine that as a part becomes more complex and more and more detail is added to each one, this also becomes very handy for rebuild time because each component only contains the detailed features for itself and not the entire model.
So if this has been going on for so long, why are we talking about it today you ask?
Great question, the reason I’m bringing it up is to let you know that when it comes to utilizing 3D Sculptor on the 3DEXPERIENCE Platform, you can keep using this exact same workflow. The only difference is that when you create your master model, xShape makes it extremely quick and easy to achieve your complex industrial designed organic shape.
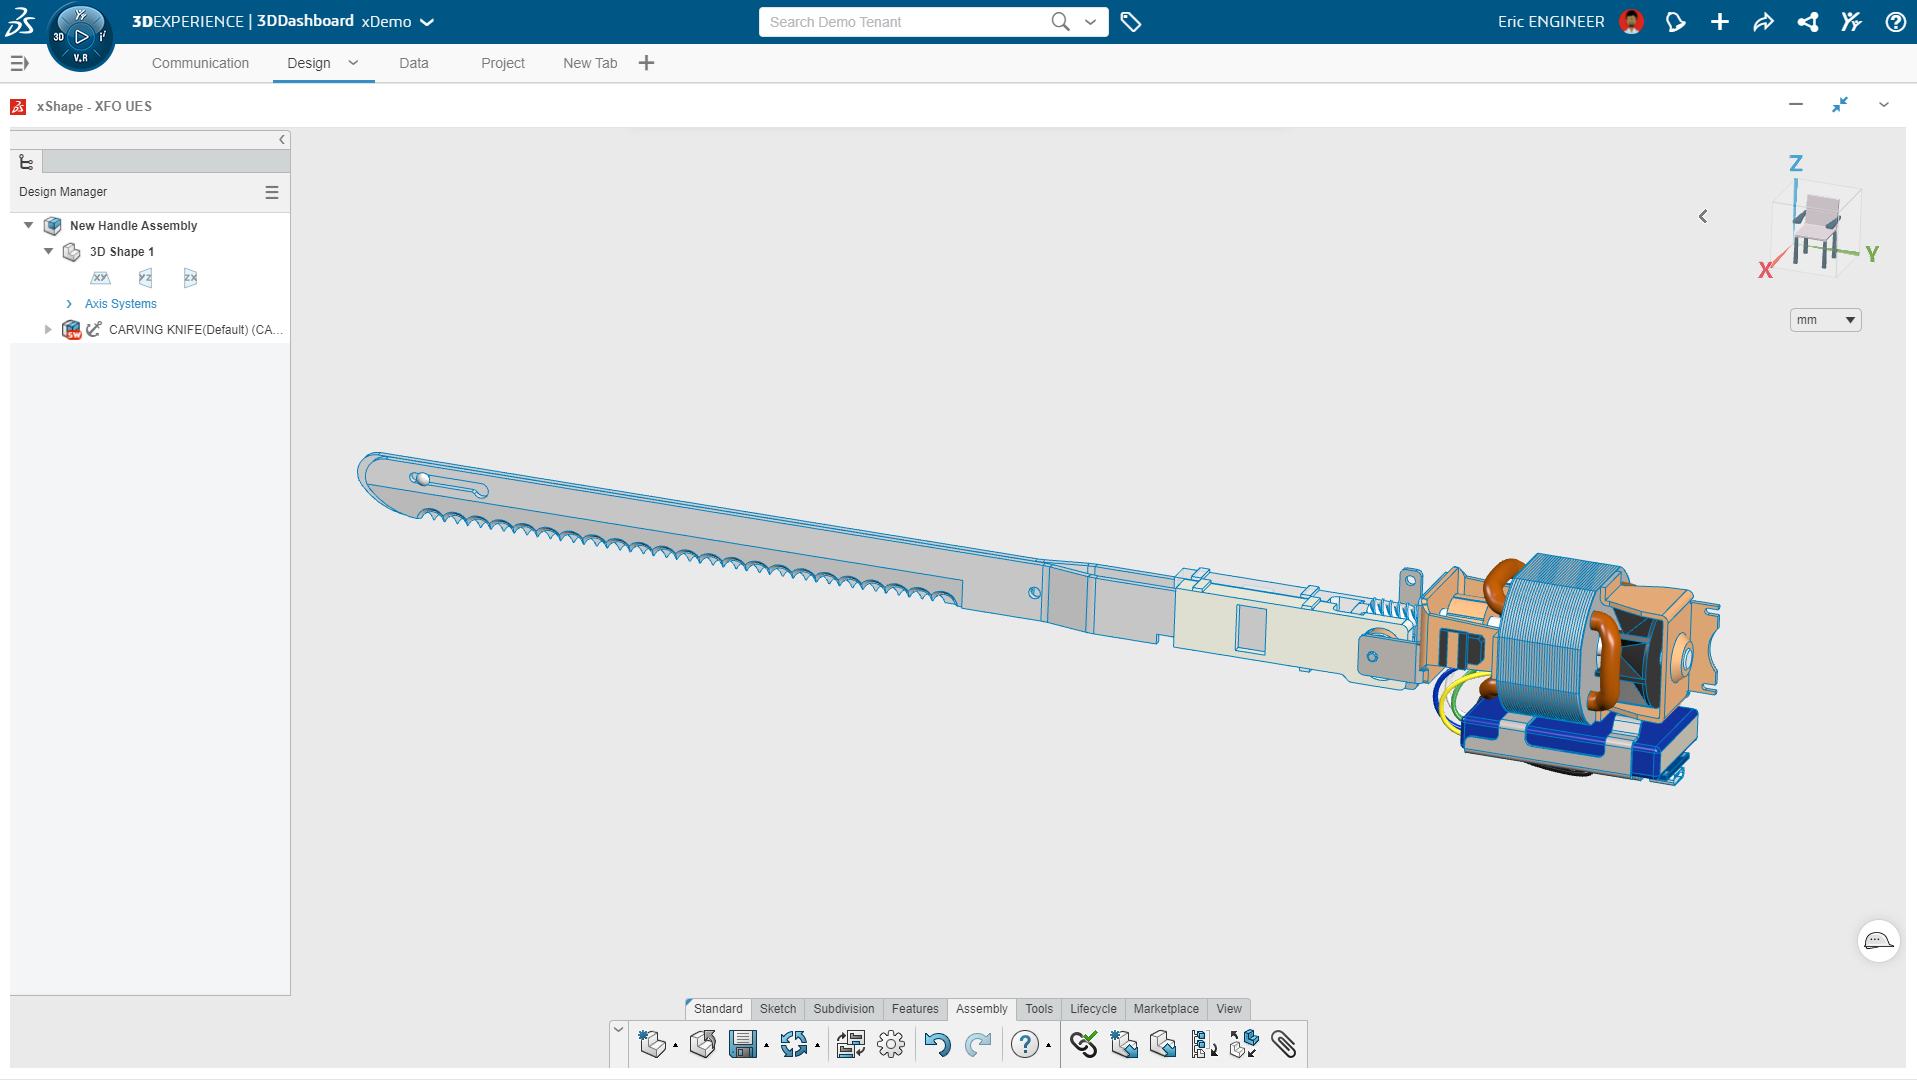
Let’s take a look at this example. It’s an electric carving knife that we want to redesign.

You can see that the old handle no longer fits our new battery pack, and to be honest it’s a bit dated. All I need to do is save it to the 3DEXPERIENCE platform with the SOLIDWORKS Connector that’s included in the 3D Sculptor role.
Then I can just open it directly inside of xShape (also part of the 3D Sculptor role).
Once it’s in xShape, creating a sleek industrial designed organic shape takes just a few minutes.

Now I’ve created my master model. That’s it. No massive complicated surfacing tree. Just a matter of minutes of pushing and pulling in xShape. Now I just need to use the “Insert Part” trick we talked about earlier. The same one we’ve been using for decades.

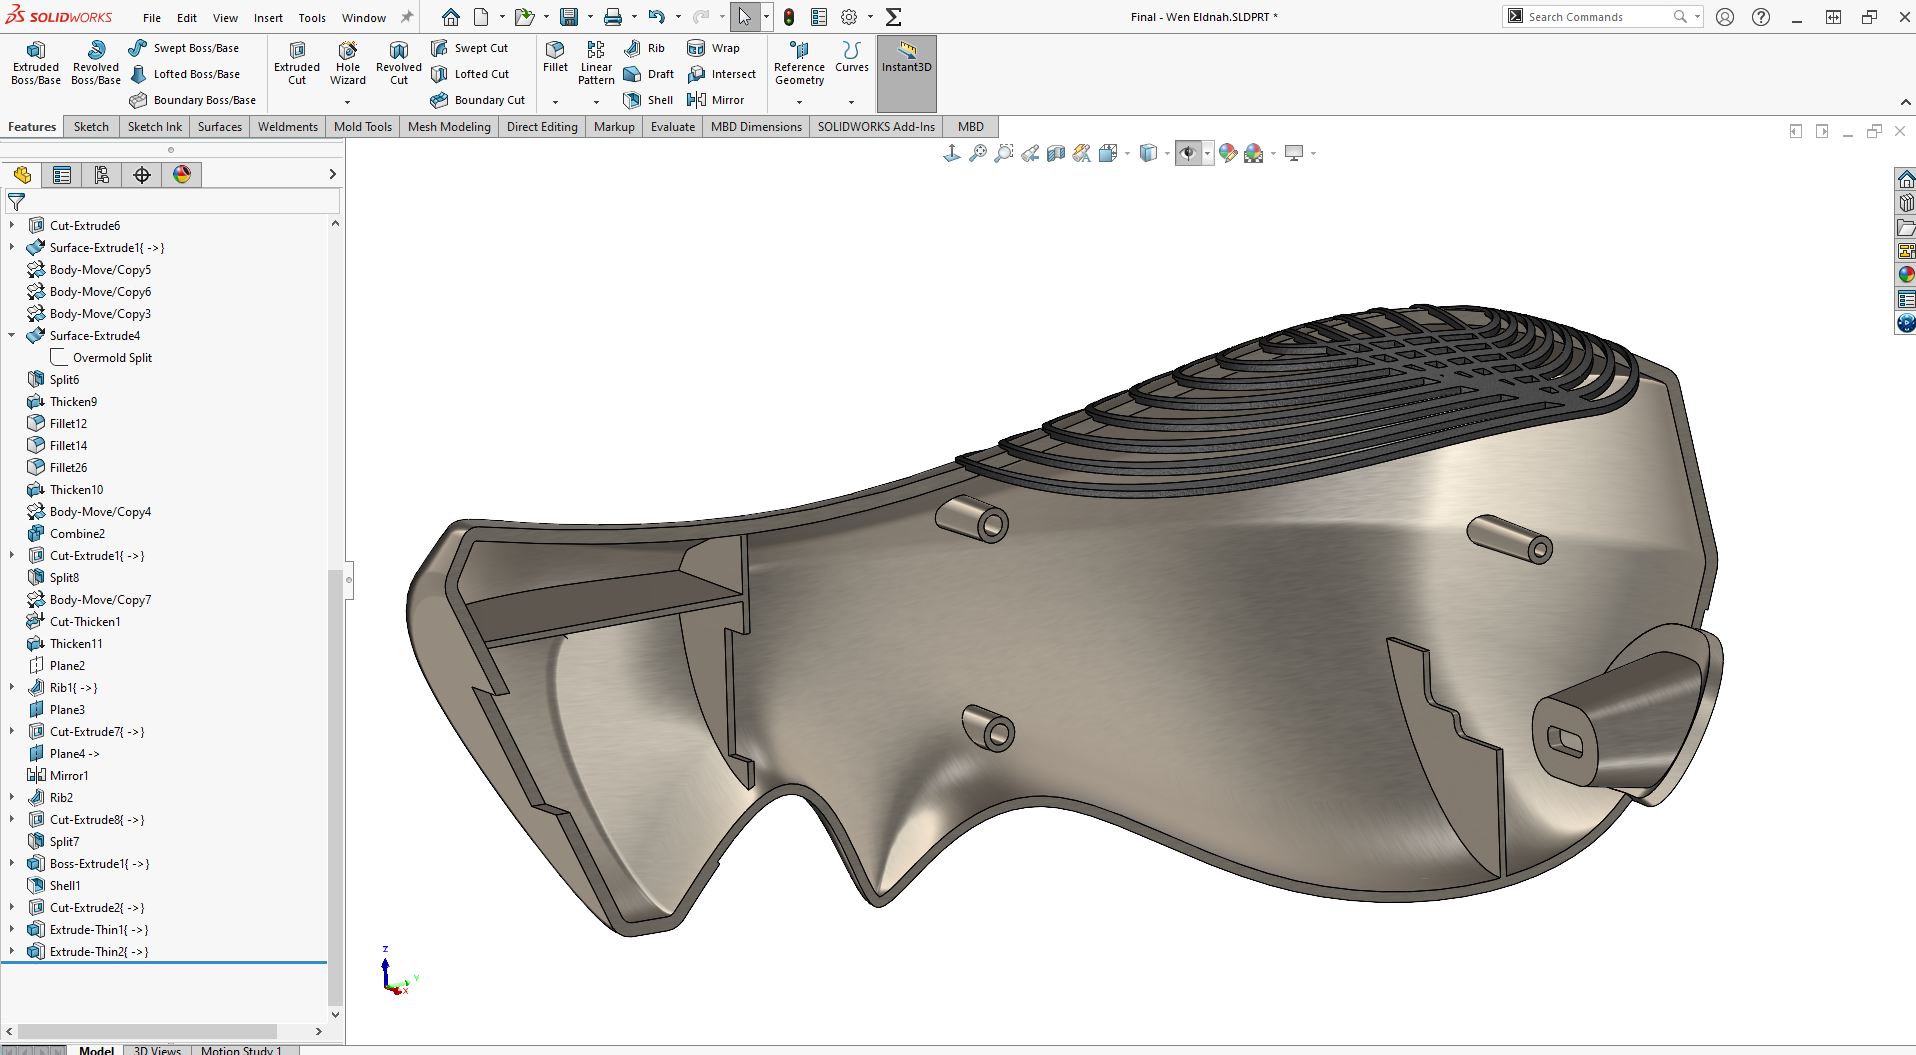
Now it’s just a matter of adding some good ol’ parametric SOLIDWORKS features to split up the model and add some manufacturability to the model.
We’ll start with a fancy grip pattern built off the top surface.

Next I’ll add some fillet blends and an overmold created from a sketch that is directly related to vertices on the master model (some of you are probably wondering if they will update okay…)

After that I’ll split the left and right sides, add some ribs and mounting bosses and create a separate charging port in the rear.
I could have easily put the “Insert Part” feature into every component like we did with speaker in the first example. But for this one I decided to make all my features here and then use the “Save Bodies” command to create a separate .SLDPRT for each body.

Now I have 5 components that I can insert into my carving knife assembly.

Since they are all controlled by the master model. I can simply change that master shape and watch them all update. The only difference here is that the master shape was created in xShape on the 3DEXPERIENCE platform.

That was really fast. Honestly, how many sketches and features would have needed to change in traditional parametric modeling?
Now it’s just a matter of saying “Reload from Server” in the SOLIDWORKS Connector task pane on the right.

Just like that, everything updates, no errors, first try.
I love it when a plan comes together…
Originally posted in the SOLIDWORKS Tech Blog.