In this blog post, we go through the process of adding a custom thread profile, should the profile / size that you require not be available in the standard options.
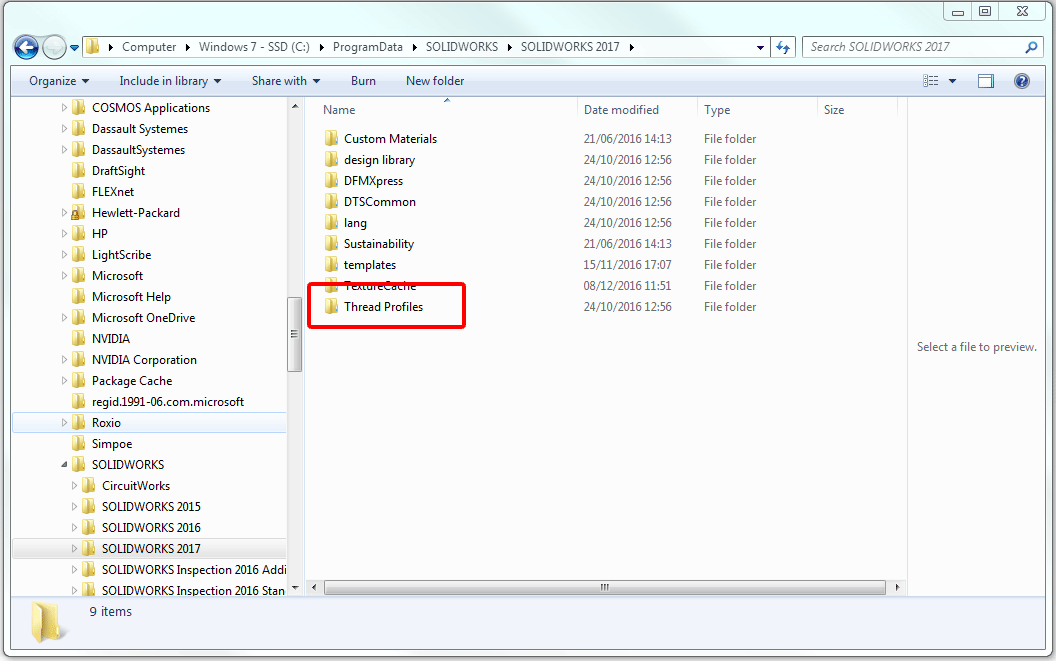
Step 1:
The first step is to locate the thread folder where all the profiles are kept, to add your own custom thread to the group. The default directory for storing thread profiles is C:\ProgramData\SolidWorks\SOLIDWORKS YYYY\Thread Profiles.
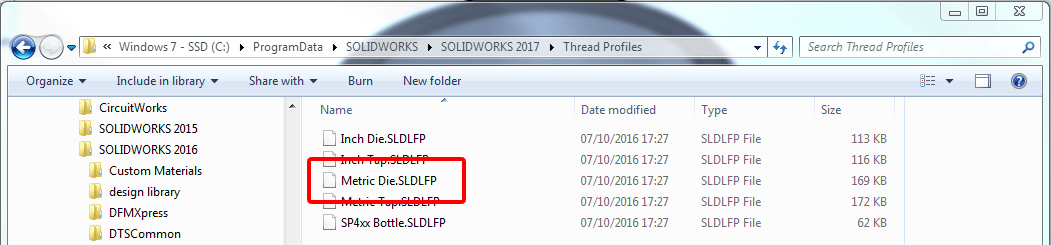
Step 2:
Depending on what sort of thread you want to add e.g. Metric Tap or Metric Die, you need to open the correct file type in SOLIDWORKS to add your own configuration, in this case “Metric Die”.
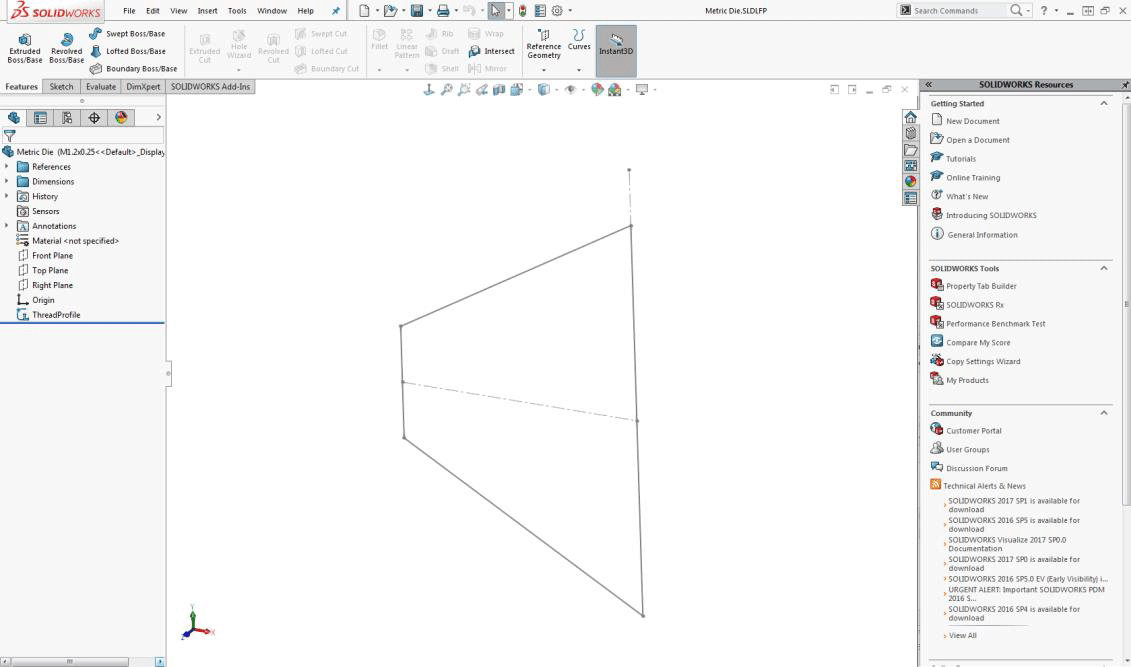
Step 3:
Once you have opened the “Metric Die.SLDLFP” it should look like this (As seen below), this is the profile that cuts the bar/shaft:
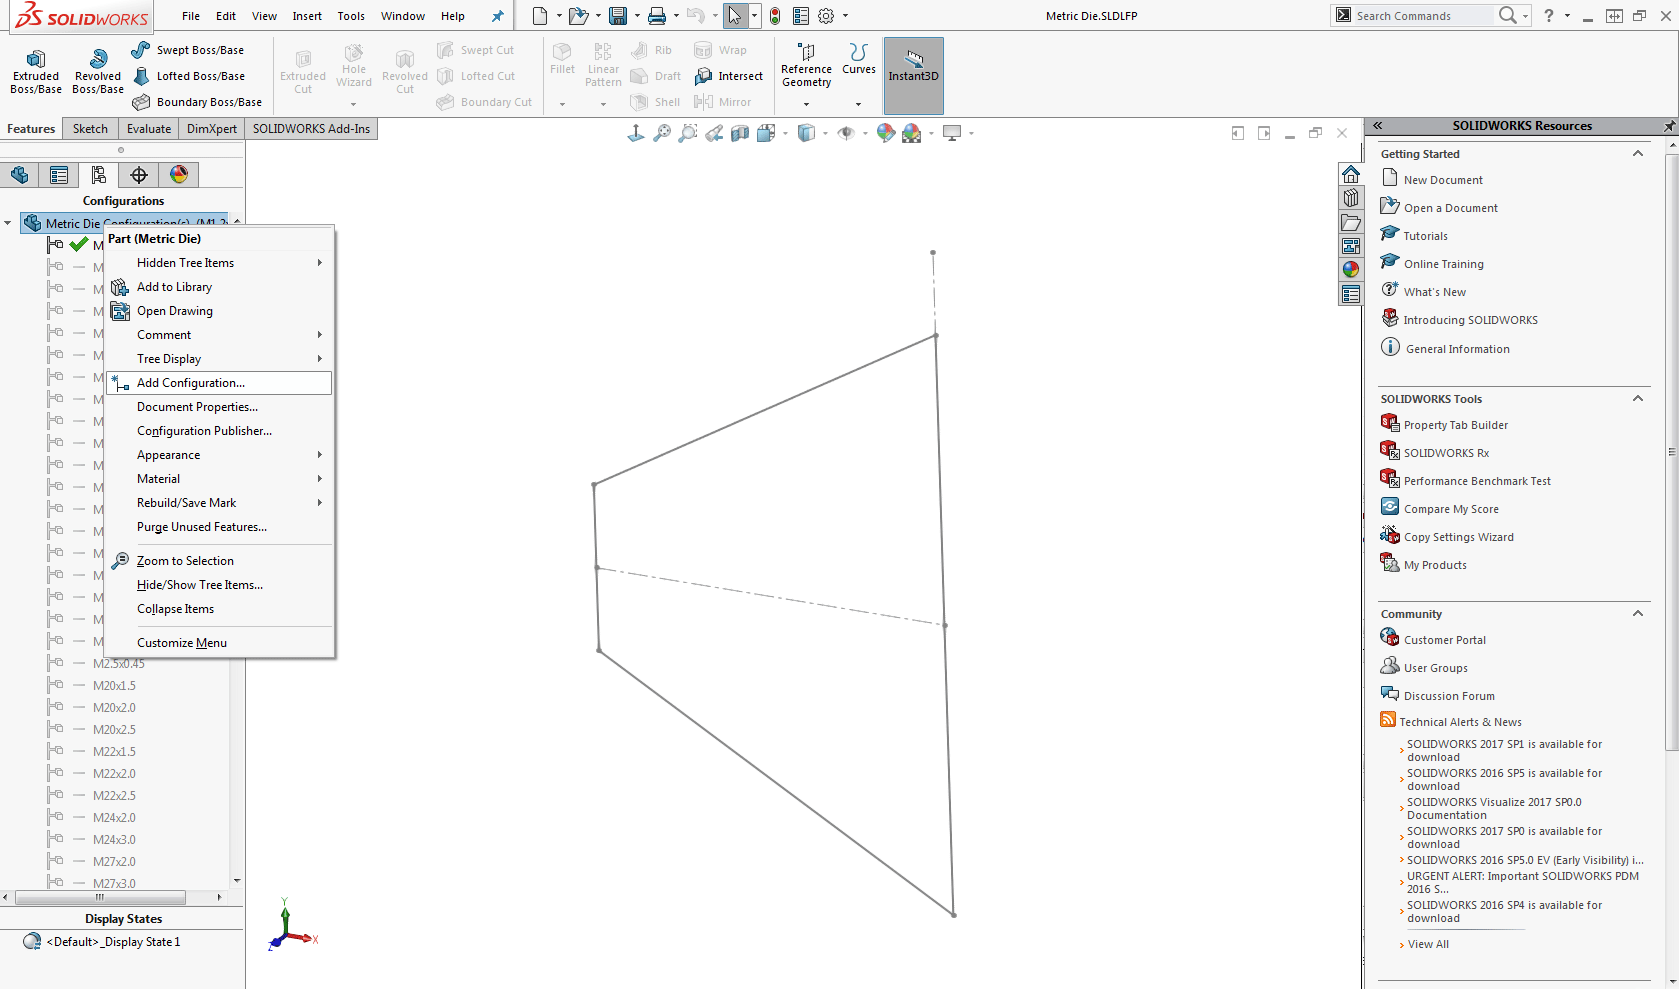
Step 4:
Open the “Configurations Tab” and add a Configurations.
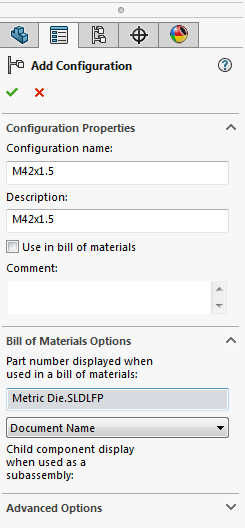
Step 5:
Make sure you give the same “Configuration name” to the “Description” In this case we want to create a custom thread for M42x1.5 as shown in the image.
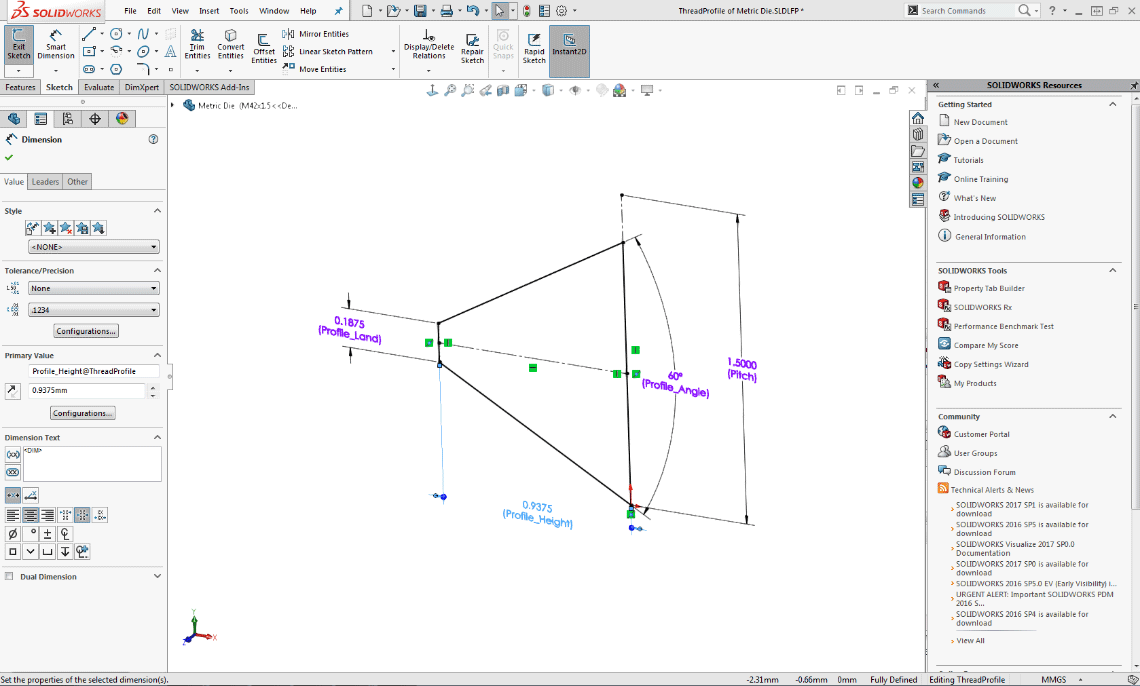
Step 6:
Open the configuration created, edit the sketch so that the profile is correct to your standard and save.
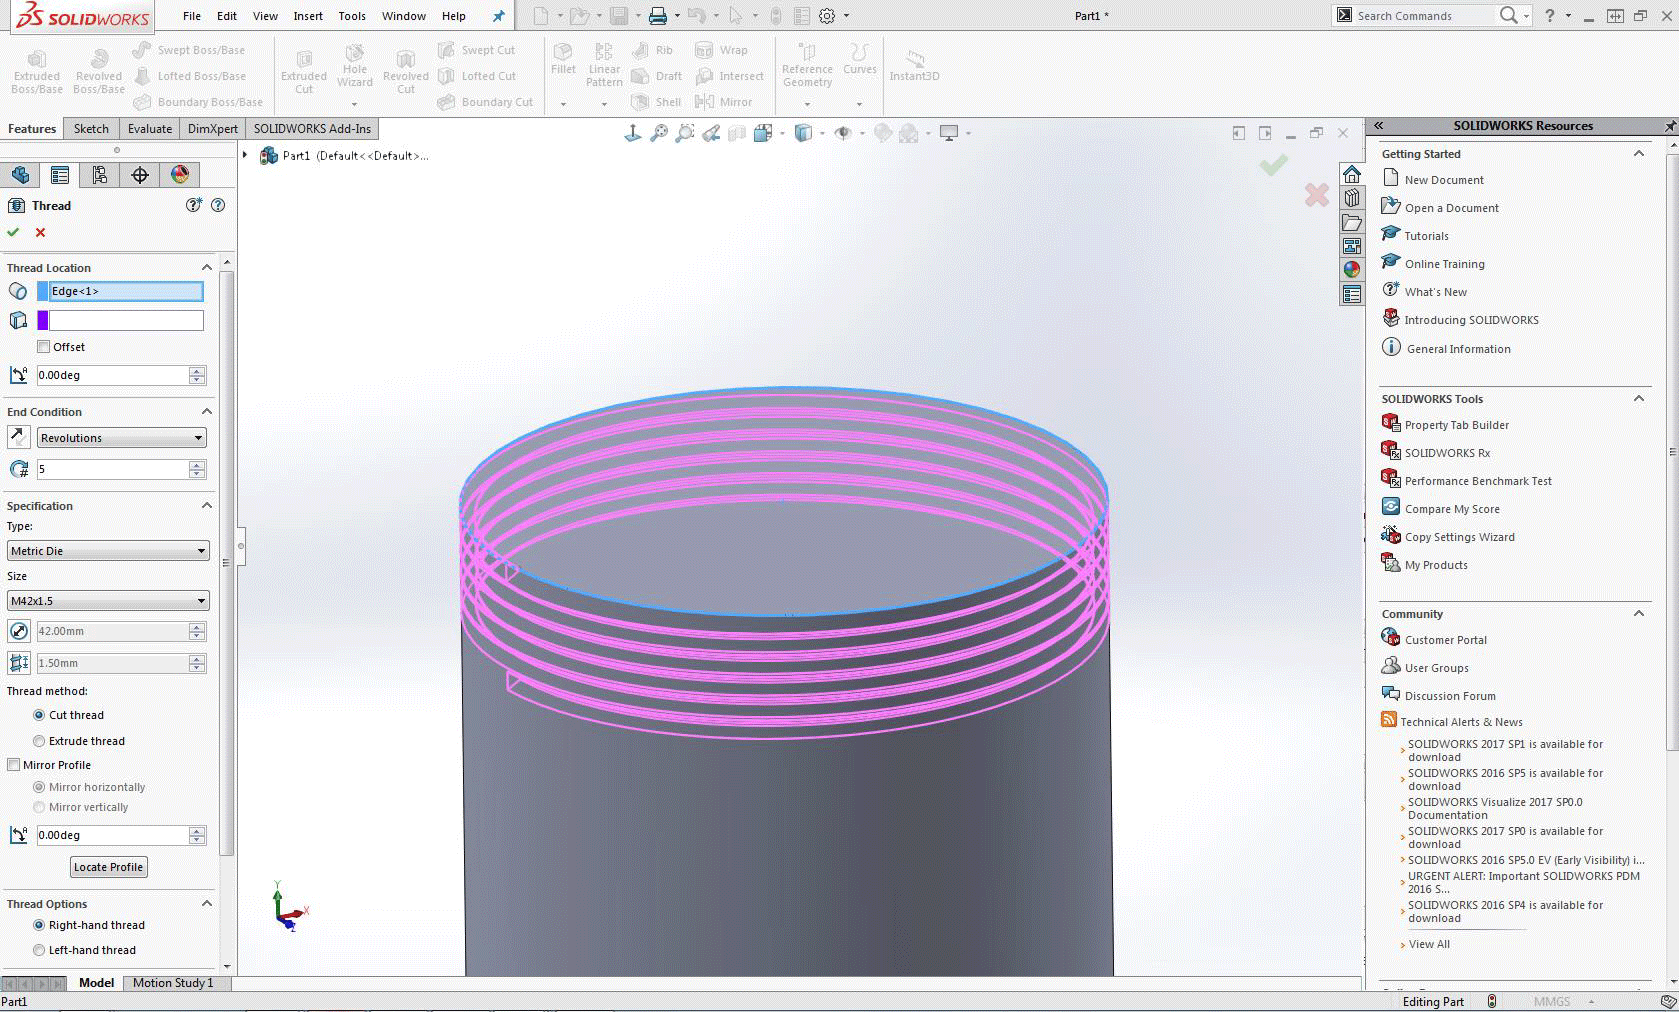
Step 7:
On your part, you can now apply the custom thread created as shown below:
The video below also take you through this process, step by step.